💎 Telegram Bots Guide
Here you’ll learn why bots matter, how to create and configure them, what benefits they bring, and how using Telegram WebApp can enhance user engagement.
Page Contents
Why Use Bots
ℹ️ What is a Telegram bot?
A Telegram bot is a program that runs inside the Telegram messenger. It communicates with users via chat and can automate various tasks — answering questions, sending notifications, collecting data, or integrating with external services. Bots are built using the Telegram Bot API and allow many processes to be automated right inside the app.
Why do you need a bot?
Since most TON traffic is sourced through Telegram, using bots becomes a strategic advantage due to the following benefits:
- A bot complements your creative and increases user trust.
- A bot helps you retain users through mailings. Our stats show that about 15% of profits come during the second or third bot visit.
- Bots help bypass blocking systems. Instead of a direct link, the bot’s Telegram username is used.
- Bots allow you to switch domains if one gets blocked. Plus, WebApp integration helps mask the domain address.
When is a bot useful?
- If you're working with mass traffic via Telegram Spam, Telegram Ads, Instagram — a bot is a must.
- If you're working with precision targeting like AML 2.0 or Fragment Anonymous Numbers & NFT Work, a bot might not be appropriate.
- If your traffic comes from the blockchain, a bot might reduce conversion rates but increase retention. Whether you use it or not depends on your strategy — we generally see more benefits than downsides.
Creating a Bot
🚧 Use a secondary account
Do not create a bot with a drainer attached using your primary Telegram account. Sooner or later, that account may be flagged or permanently banned.
Instructions for obtaining a ready-made Telegram account can be found here: 🦣Traffic —> Telegram Spam.
To create a bot, open a private chat with BotFather (click here). You’ll need to follow a few simple steps:
- Type and send the command:
/newbot
Alright, a new bot. How are we going to call it? Please choose a name for your bot.
- Now send the name that will appear at the top of the bot’s contact page.
Be creative: bots with obvious scam references or attempts to mimic official services get blocked much faster.
Good. Now let's choose a username for your bot. It must end in
bot. Like this, for example: TetrisBot or tetris_bot.
- Enter a username for your bot. It must be unique, in English, and end with bot or Bot.
Choose something intuitive and easy to remember. A well-named bot can act as passive traffic by appearing in Telegram search.
Sample BotFather Message
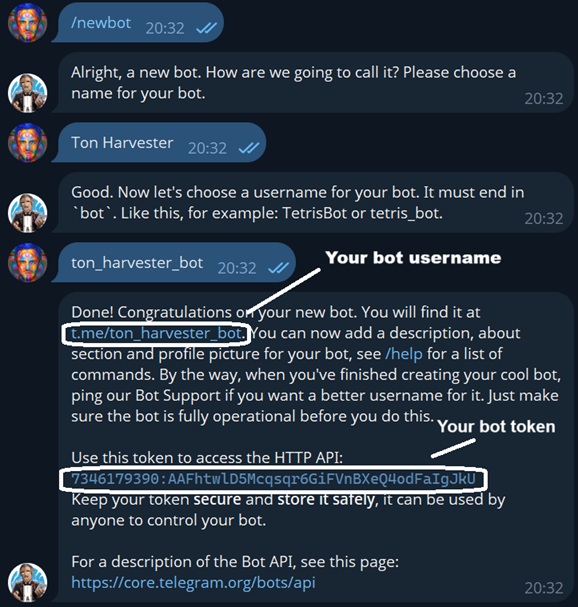
Once the username is accepted, your bot will be created.
Bot Appearance Setup
- There is no such thing as a “correct” bot appearance.
- At this stage, creativity is your best asset.
Your bot’s theme should match the theme of your landing page. The goal of bot customization is to build trust with the target.
To begin customizing your bot, open BotFather (click):
- Send the command: /mybots
Choose a bot from the list below:
- Select the bot you want to edit.
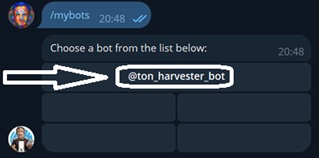
- In the menu that appears, click "Edit Bot".
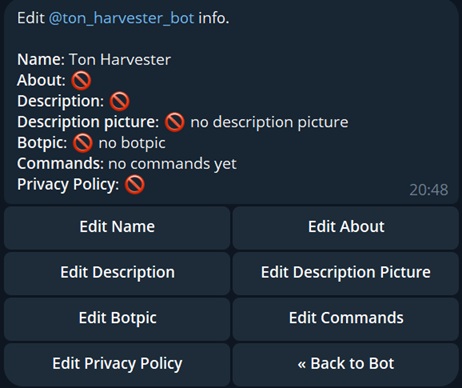
Here you'll find all visual settings. To edit a parameter, simply click the corresponding button and enter a new value.
| Parameter | Where it appears | Comment |
|---|---|---|
| Name | 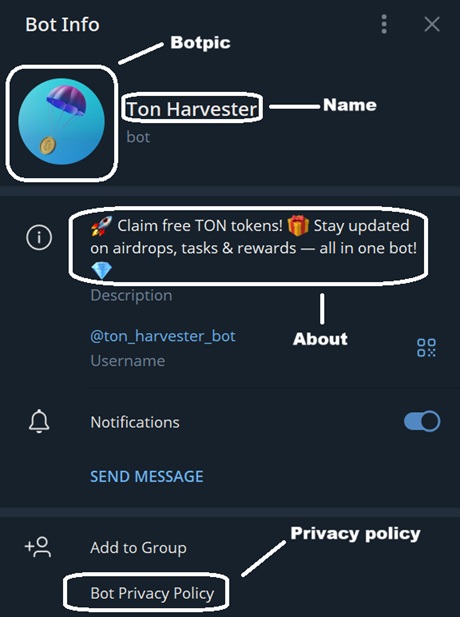 | Avoid obvious scam-related terms. |
| About | See Name parameter | Up to 120 characters. Very important. |
| Description | 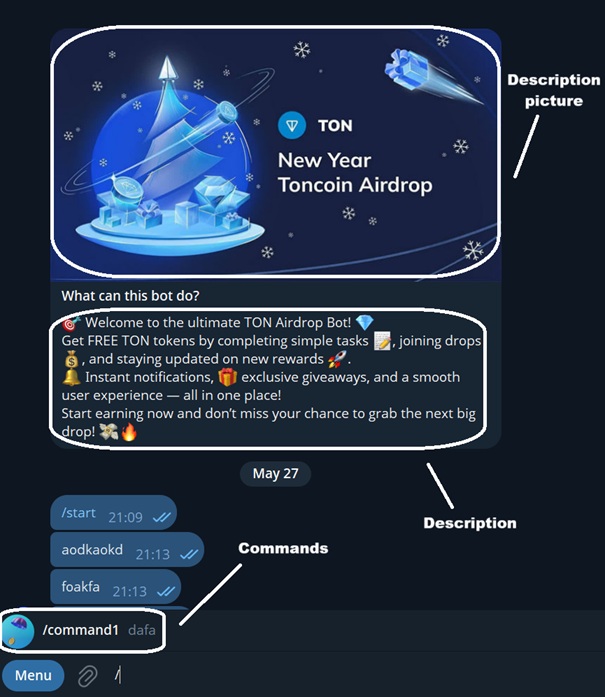 | Up to 512 characters. Optional, but recommended. |
| Description picture | See Description | Recommended. Image size: 640x360 px or GIF (320x180, 640x360, 960x540). |
| Botpic | See Name parameter | Mandatory. |
| Commands | See Description | No need to change. |
| Privacy Policy | See Name | No need to change. |
You can see a sample setup in the table above.
Using AI Tools
We recommend using neural networks to generate content quickly. ChatGPT (click) is great for writing copy and generating images if needed.
You can also use Copilot (click) for free and without registration.
Example Prompt to AI
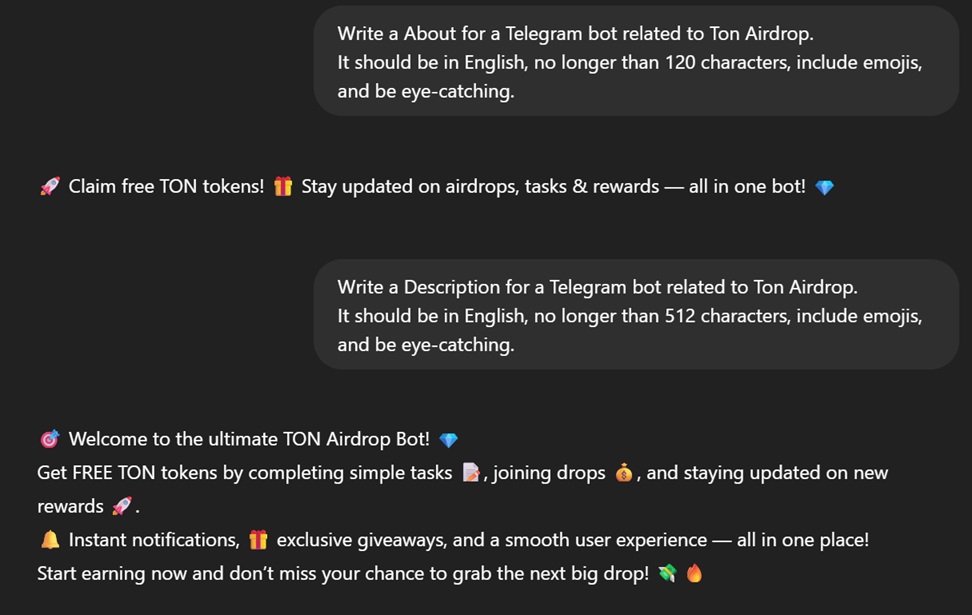
Sample prompt:
Write a {PARAMETER} for a Telegram bot themed around {LANDING PAGE TOPIC}.
It should be in English, no longer than {CHARACTER LIMIT} characters, include emojis, and be visually engaging.
You don’t have to use unique images — free stock graphics are fine.
Extra Settings
Through your chat with BotFather (click), you can configure two additional parameters that boost trust by adding buttons linking to your domain.
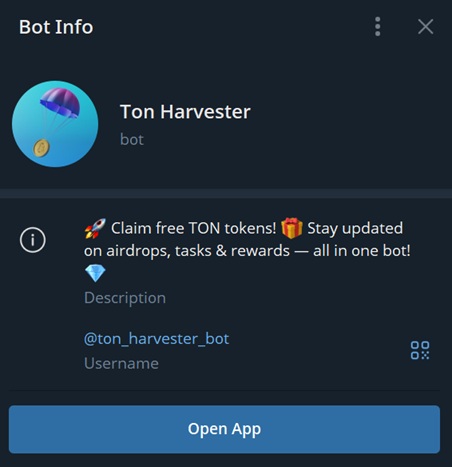
Adding the “Open Application” button in the bot’s info section:
- Send the command: /mybots
- Select your bot
- Click Bot Settings
- Click Configure Mini App
- Click Enable Mini App
- Paste your domain link
Result
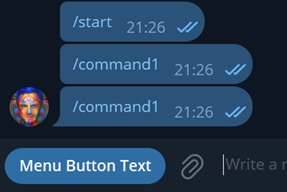
Adding the “WebApp” button inside the message input field:
- Send the command: /setmenubutton
- Select your bot
- Paste your domain link
- Enter button text
If you had previously configured bot Commands, clear them and repeat the above steps to enable this feature.
Result
Bot Functionality
ℹ️ What does “functionality” mean?
For a bot to start responding to users, a script must be connected to its token. This script processes incoming messages and sends replies to users.
We provide our workers with a Bot Constructor, which allows you to set up a complete interaction scenario without any programming knowledge.
Connecting a Bot to the Bot Constructor
To connect your bot to the builder, follow these steps:
- In the main menu of our bot, go to 🤖 Bot Constructor —> ➕ Add Bot.
- Select the domain that will be linked to this bot.
- Enter the bot token from BotFather (click).
The token is provided when creating the bot. You can also find it again by sending the command /mybots —> your bot —> Api Token.
Example of a token: 7718084307:AAFj8YgTzkHIqWdKwF3HN2fK5q1aWezLLKg
Configuring a Welcome Message
To make your bot respond to users, navigate to 🤖 Bot Constructor —> your bot —> 📝 Configure responses.
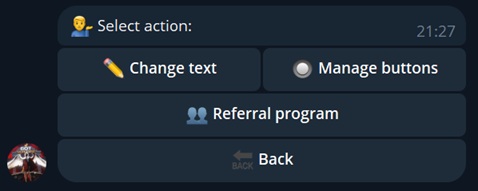
Click "Change text" and send the message that targets will receive.
You can attach files, use formatting, and add variables to your message.
• {first_name} - user’s first name
• {last_name} - user’s last name
• {username} - username without @
• {@username} - username with @
• {telegram_id} - user’s Telegram ID
• {ton} - TON to USD exchange rate

🎲 Random values and calculations:
• {random(x,y)} - random number from x to y
• {1: expression} - store result in label 1
• {2: ^1 * 2} - use label 1’s value
Example Welcome Message
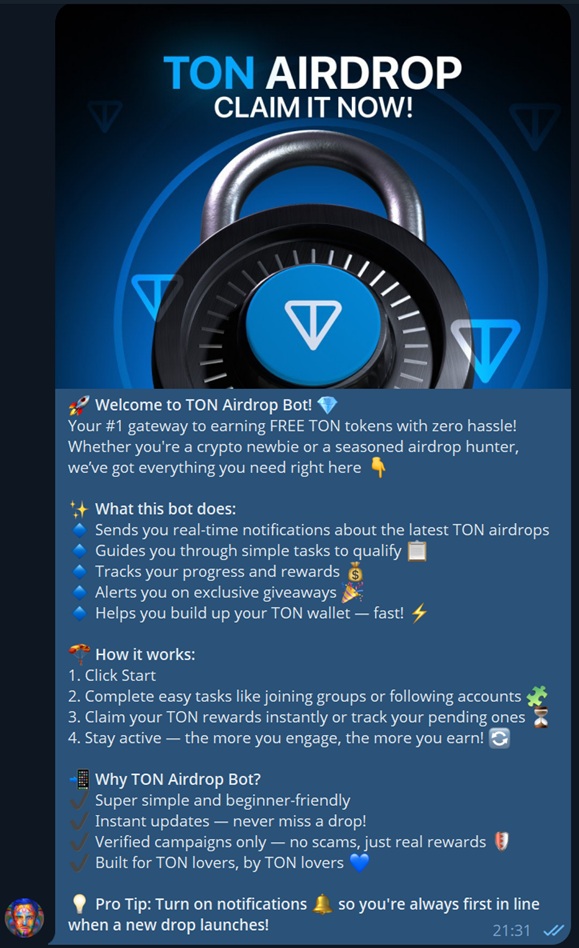
To configure buttons for the welcome message, click 🔙 Back —> 🔘 Manage buttons.
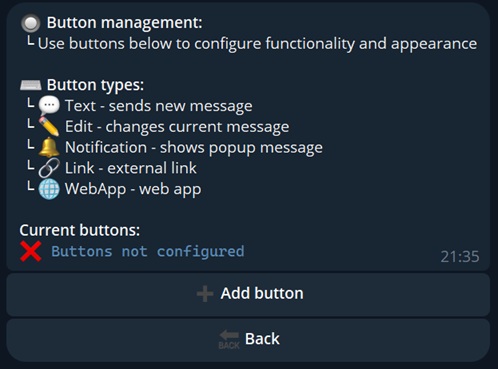
Add the buttons you need. At the very least, we recommend including: a WebApp button and a "Link" button — point it to your official resource.
Example Button Configuration
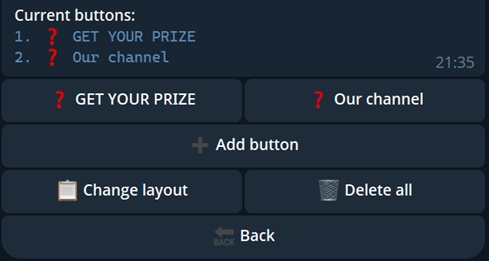
The user sees two buttons. One opens the drainer site wrapped in Telegram WebApp, the other leads to the official Ton Community Telegram channel.
If it fits your creative concept — we recommend enabling the referral system. Click 🔙 Back —> 👥 Referral program.
The referral system encourages targets to spread your resource under the guise of a reward.
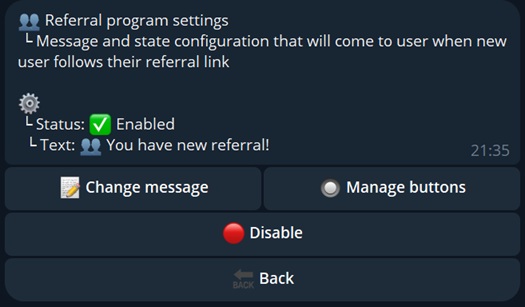
- 📝 Change message — enter the text shown to the user when someone joins using their referral link;
- 🔘 Manage buttons — if needed, add buttons to this message as well.
Add a button with a message that describes your referral program "terms" in the welcome message.
To do this, go to the bot’s main settings menu: 📝 Configure responses —> 🔘 Manage buttons —> ➕ Add Button —> 💬 Text.
Use the variable {referral_link} in your message.
Example Referral Message
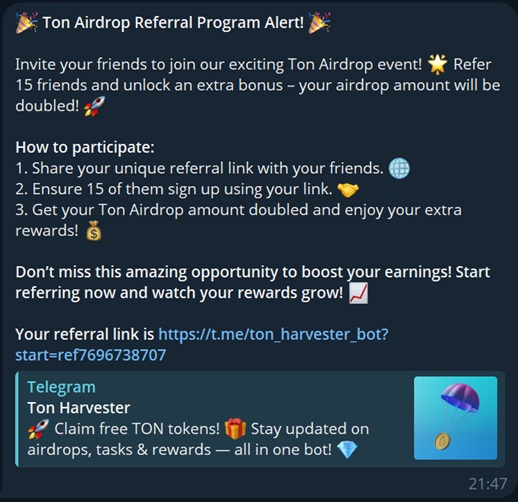
🎉 Ton Airdrop Referral Program Alert! 🎉

Invite your friends to join our exciting Ton Airdrop event! 🌟 Refer 15 friends and unlock an extra bonus – your airdrop amount will be doubled! 🚀

How to participate:
1. Share your unique referral link with your friends. 🌐
2. Ensure 15 of them sign up using your link. 🤝
3. Get your Ton Airdrop amount doubled and enjoy your extra rewards! 💰

Don’t miss this amazing opportunity to boost your earnings! Start referring now and watch your rewards grow! 📈

Your referral link is {referral_link}
Basic bot setup is complete. The bot is now styled and will respond to users with your welcome message.
Example Start Message
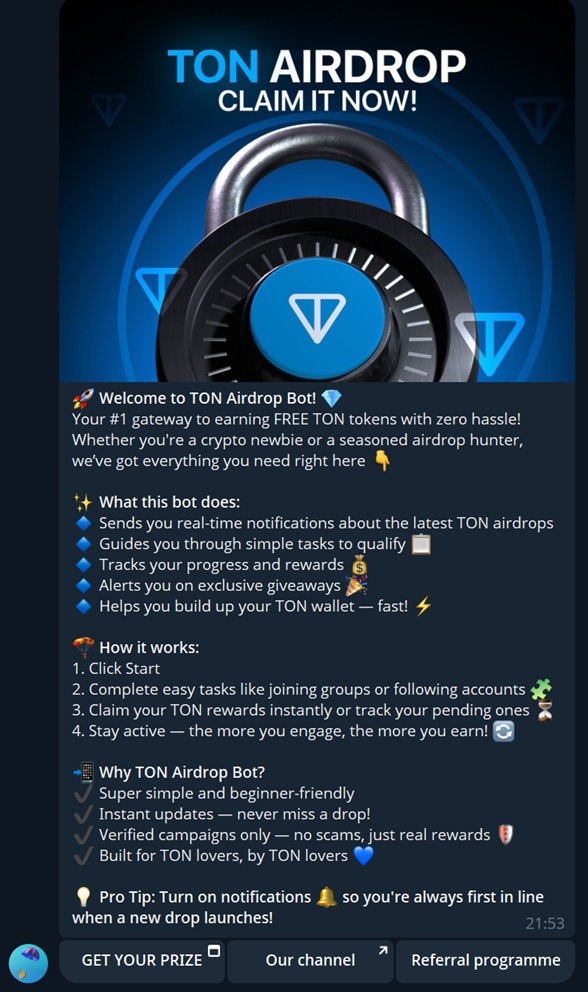
You can now proceed to 🦣Traffic.
⚠️ Attention
By default, the bot is disabled in the constructor. To enable it, go to the bot’s settings main menu and click "🚀 Start"
Constructor Features
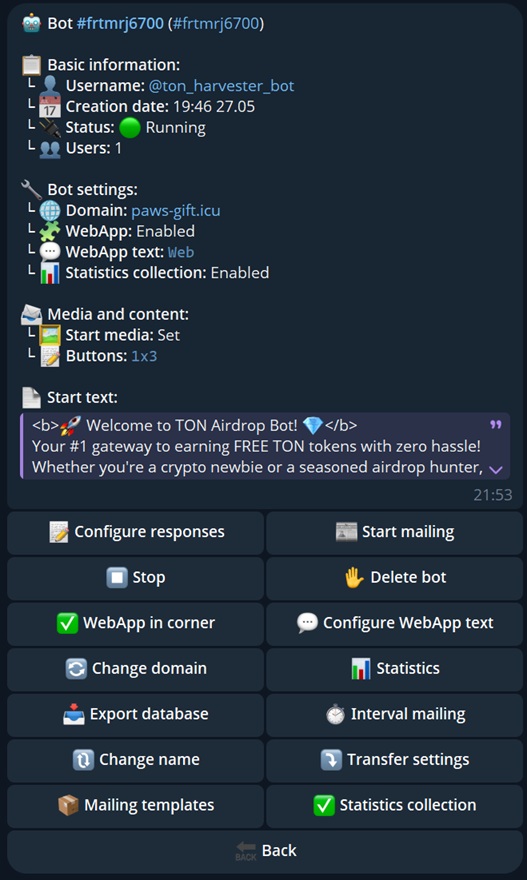
Guide to the features and how to use them in the bot constructor.
📝 Configure responses
Edit the message your bot sends to users.
This is explained in detail in the Configuring the welcome message section.
🚀 Start and ⏹️ Stop
Enable or disable the bot’s token in the constructor.
✋ Delete bot
Permanently removes the bot from the constructor and frees up the slot.
🔄 Change domain
Here you can change the drainer domain linked in the WebApp. Useful if the domain has been blocked.
Full domain replacement process:
- In the bot constructor, click 🔄 Change domain, and select the new one (it must be linked in the domain list).
- Re-add the buttons in 📝 Configure responses.
- To update the domain in the WebApp button, repeat the steps from Extra Settings
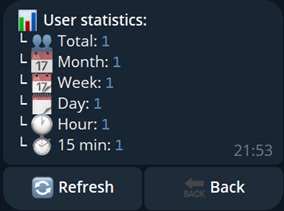
📊 Statistics
Displays user statistics for your bot.
Note: A domain visit ≠ bot user. If someone visits your domain without starting the bot with the /start message, they won't appear in the stats.
📥 Export database
Downloads the database of all users in CSV format:
user_id,first_name,last_name,username,date_addedUseful if you decide to stop using our constructor and switch to your own solution.
🔃 Change name
Visual setting to rename your bot inside the constructor.
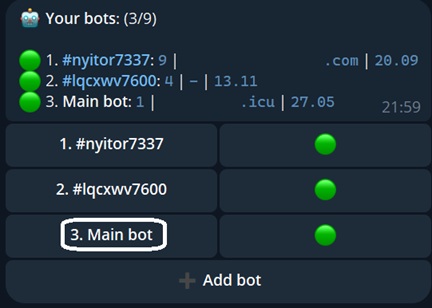
⤵️ Transfer settings
Transfers the constructor settings from one bot entity to another.
Practical example: Your Telegram bot got deleted and you created a new one. Just add the new bot to the constructor and use this feature to copy settings from the old one.
✅ Statistics collection
Here you can enable or disable user tracking in the database.
Attention! When statistics collection is turned off, users who interact with your bot won't be added to the database, meaning you won’t be able to message them later.
This feature is useful if you're simulating bot starts and want to avoid cluttering your database with fake users. Don’t forget to enable stats collection again before launching traffic!
WebApp Features
The bot constructor can manage the WebApp button in the input field by itself.
You don’t need to run the /setmenubutton command in @BotFather, as explained in Extra Settings.
- ✅ WebApp in corner — toggles WebApp button visibility.
- 💬 Configure WebApp text — changes the button text.

Mailing
ℹ️ What are mailings?
Mailings are messages sent to Telegram users by your bot.
The purpose of a mailing is to bring the victim back to your drainer offer. To receive a message, the user must be in your bot’s database. If statistics collection is enabled, this happens automatically when the user sends the /start command.
⚠️ Warning
If you use variables in your message, do not format them. For example, {@username} will not resolve to the user’s @Username if it's bolded.
Avoid formatting variables!
📰 Start mailing
Use this option to launch a one-time broadcast to all users.
You must enter the message (supports formatting, variables, attachments), optionally configure buttons, and then confirm sending.
Example of a mailing
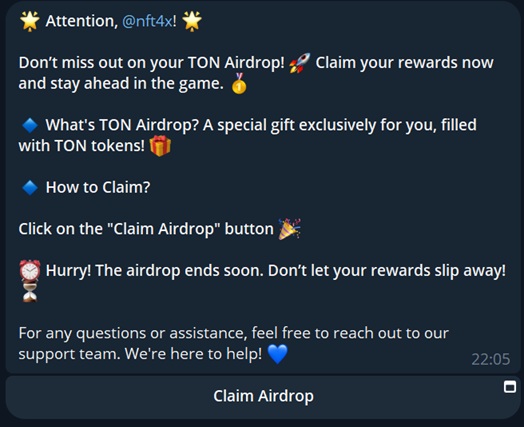
🌟 Attention, {@username}! 🌟

Don’t miss out on your TON Airdrop! 🚀 Claim your rewards now and stay ahead in the game. 🥇

🔹 What's TON Airdrop? A special gift exclusively for you, filled with TON tokens! 🎁

🔹 How to Claim?

Click on the "Claim Airdrop" button 🎉

⏰ Hurry! The airdrop ends soon. Don’t let your rewards slip away! ⏳

For any questions or assistance, feel free to reach out to our support team. We're here to help! 💙
⏱️ Interval mailing
This feature allows you to set up automated mailings based on a defined time interval.
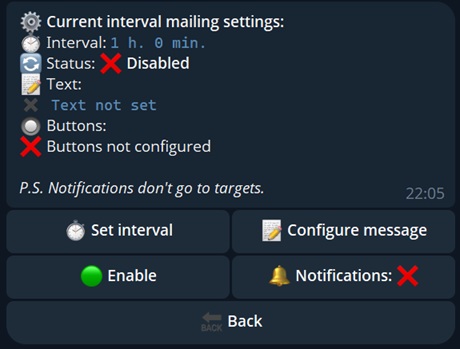
- ⏱️ Set interval — specify how often the interval mailing should occur;
- 📝 Configure message — enter the mailing message (supports formatting, variables, attachments);
- 🟢 Enable / 🛑 Disable — turn interval mailing on or off;
- 🔕 / 🔔 — send the mailing silently (without a notification) or with a notification.
📦 Mailing templates
In this section, you can manage mailing templates.
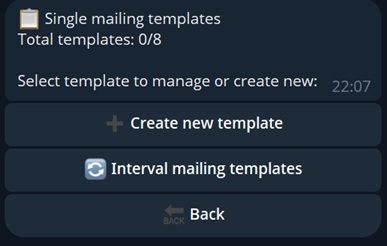
Single mailing templates. Switch the template type, enter a name and a message (supports formatting, variables, attachments).
A template will be created. You can launch a mailing based on it with a single click.Interval mailing templates. Switch the template type, enter a name and a message (supports formatting, variables, attachments).
A template will be created. You can insert its message into the interval mailing (interval and notification settings are taken from the interval mailing settings) with a single click.
WebApp Telegram
ℹ️ What is Telegram WebApp?
Telegram WebApp (or WebApp Telegram) is a web application that can be integrated directly into Telegram. It allows users to interact with a website right inside the messenger — no need to open an external browser.
In the context of a drainer, Telegram WebApp is your domain displayed within Telegram’s internal browser, hiding the actual site address.
If you want the drainer page to open immediately without interaction with the bot, you need to use Telegram WebApp.
How to create a Telegram WebApp?
To create a WebApp, go to BotFather:
- Send the command: /newapp
Alright, a new web app. Which bot will be offering the web app?
- Choose the bot that will host the WebApp (its username appears in the link).
Creating a new web app for @ton_harvester_bot. Please enter a title for the web app.
- Enter a name for the WebApp (shown in the link preview and WebApp title bar).
Please enter a short description of the web app.
- Enter a description for the WebApp (shown in the link preview).
Please upload a photo, 640x360 pixels.
- Upload a 640x360 image for the WebApp (shown in the preview).
Now upload a demo GIF or send /empty to skip this step.
- Send a GIF or type /empty to skip.
No problem, you can always add a GIF later using the /editapp command. Now please send me the Web App URL that will be opened when users follow a web app direct link.
- Now send the URL to your drainer domain.
Good! Now please choose a short name for your web app: 3-30 characters, a-zA-Z0-9_. This short name will be used in URLs like t.me/ton_harvester_bot/myapp and serve as a unique identifier for your web app.
- Enter a short name for the WebApp (used in the final URL).
Good! Now please choose a short name for your web app: 3-30 characters, a-zA-Z0-9_. This short name will be used in URLs like t.me/ton_harvester_bot/myapp and serve as a unique identifier for your web app.
Your Telegram WebApp is now created. BotFather will send you the final link.
Result
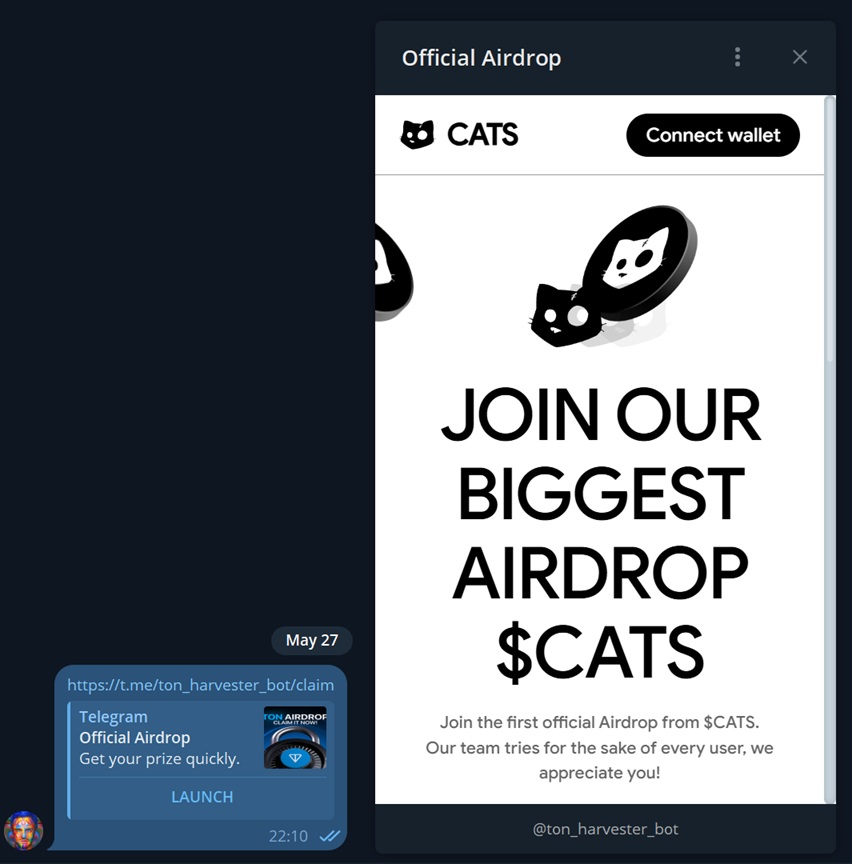
You can now distribute this link, which immediately opens the drainer inside Telegram WebApp.