💎 Settings Guide️
This guide covers the configuration and capabilities of TON Drainer. You'll learn how to get started by creating an attractive offer.
Page contents
Domains
ℹ️ What is a domain?
A domain is a unique name used to identify a website on the internet. It serves as the address users type to find your site and consists of several parts separated by dots.
For example, in the address example.com, example is the domain name and .com is the domain zone.
To use TON Drainer, you need to connect a domain through our bot. You can choose between “shared” domains or a private one of your own.
Shared domains:
- Free to use, no purchase or extra setup required.
- Higher risk of being blacklisted, since the domain is used by multiple workers.
- You cannot use a custom domain name. You choose from a pre-made list.
Private domains:
- Require purchase and setup. You’ll need to add NS records with your registrar.
- You can choose any available domain name and zone.
- Minimal risk of being blocked.
The next section covers how to purchase a domain. If you plan to use a shared domain, you don’t need to buy anything.
Purchasing a Domain
We recommend using Telegram bots to purchase domains. You can use your main account — the bots listed below are anonymous.
Recommended domain sellers:
Regular domains:
- @FastDomainBot — this bot is used in the setup example below.
Bulletproof domains:
- @BPdomains_bot — abuse-resistant, ideal for direct traffic.
Example of domain purchase
- Open @FastDomainBot and send the command /start.
- Click the button Buy Domain ⚡️.
- Enter the domain name you want to buy, e.g.,
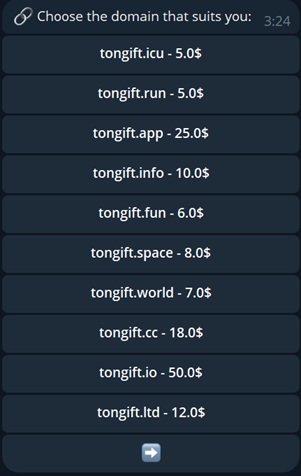
tongift. - Review the domain zones and prices, then pick the one you prefer.
- Click Profile 👤 —> Top up balance 💰.
- Add funds using your preferred payment method.
- Go back and complete your domain purchase.
Domains are purchased for one year. You can renew them as needed.
Adding a Domain
To add your domain and get started, open our bot @RublevkaTeam_bot.
In the main menu, click 🌐 Domains —> ➕ Add Domain
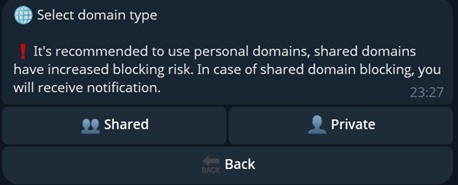
To add a shared domain:
- Click 👥 Shared
- Choose the domain to which your subdomain will be linked.
- Enter your subdomain — a single lowercase English word.
You're done. You can now set up your design and adjust other settings.
To add a private domain:
- Click 👤 Private
- Enter the domain you purchased.
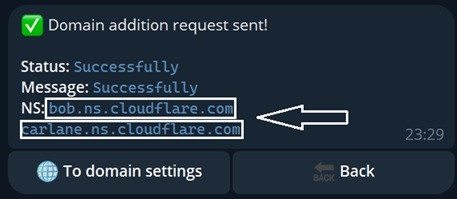
- Copy the NS records provided and paste them into your domain registrar’s settings.
Using @FastDomainBot as an example:
- Click My Domains 📋
- Select the domain you want to link.
- Click 🔄 Change NS Records.
- Paste the NS records provided by our bot during domain addition.
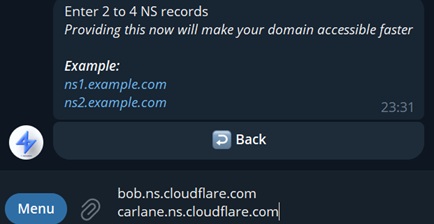
Domain addition complete. Wait for the domain to link — this typically takes under an hour.
If the domain hasn’t linked after a long time, contact any member of our support team.
Design Installation
To display a website when your domain is opened, you need to install a design (landing page) on it.
To do this, go to the main menu and click 🌐 Domains —> select the domain you want to configure —> ✏ Design️.
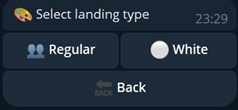
White designs do not include the drainer script. These are used to pass moderation and remove Red Table warnings.
Regular designs come with a drainer preinstalled. Choose one of these to begin your work.
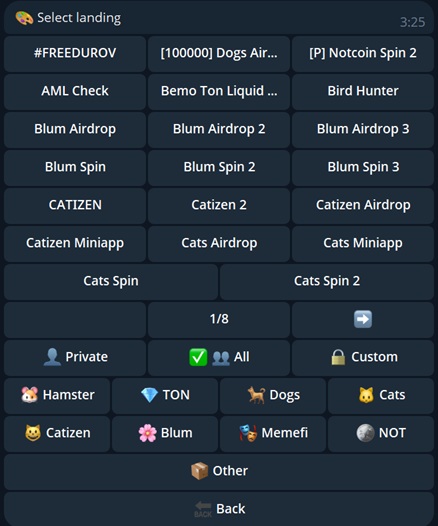
A design selection menu will appear. Choose any template you’d like to use.
You can preview all available designs in our Telegram channel "Designs" (🛡 Team Resources)
Uploading a Custom Design
If needed, you can upload your own landing page.
From the main menu, go to ❗️Worker Panel —> ⚒️ Custom Design
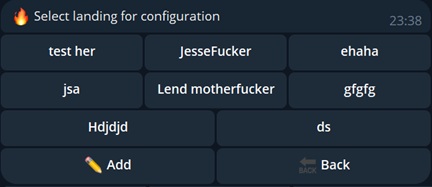
Click ✏️ Add. Enter a name for the landing page — this will be displayed in the bot.
Then click View —> 📝 Upload landing. Specify the type of your landing page: White or Drainer.
If you're uploading a white design, send the bot a .zip archive of your landing. The archive must contain
index.htmland, if needed, accompanying graphics and styles.If you're uploading a drainer design, pay attention to the prompt shown in the bot.
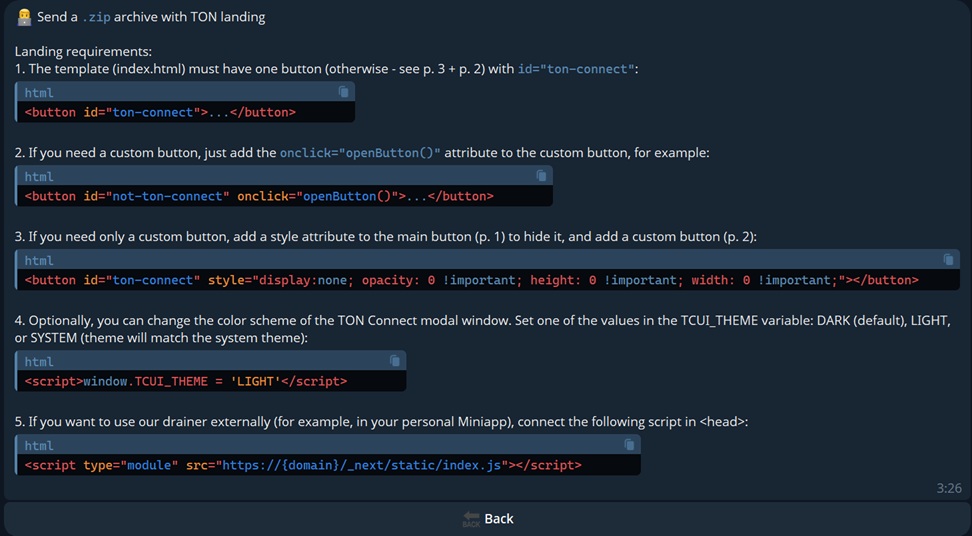
Once uploaded, your private design will appear exclusively for you in the design list — Design Installation.
Subdomains
You can create additional domains under your personal domain.
These "Additional domains" are called subdomains — they retain your primary domain in their name but can have completely different configurations.
To create a subdomain, go to the main menu and select 🌐 Domains —> the domain you want to base the subdomain on —> 🔡 Subdomains —> ➕ Add Subdomain.
Enter the name of the subdomain (only English letters, numbers, and hyphens are allowed).
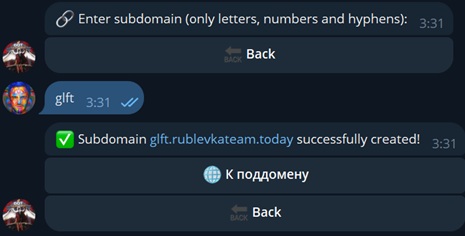
rublevkateam.org is the personal domain you added earlier, and glft is the subdomain you created.
Now the new subdomain will appear in your full domain list.
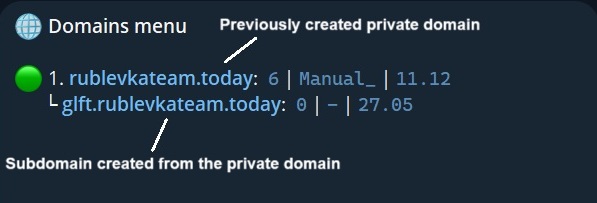
A subdomain can have different settings, a separate design, and more. It functions as an independent domain.
Drainer Configuration
Contract Settings
ℹ️ What is a contract?
A contract is an automated set of instructions written in a specialized programming language that executes on the TON virtual machine.
When a victim connects their wallet to your site, they are prompted to sign a "Contract". Based on the settings below, and the specific assets the target holds, the contract will look and behave differently.
Once the contract is approved, all of the victim’s assets are transferred to you.
To configure the contract, go to the main menu: 🌐 Domains —> select the domain you want to configure —> 💻 Drainer Settings.
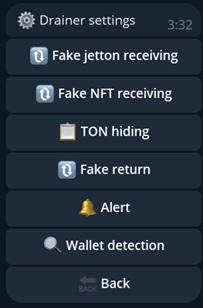
⚠️ Attention
The number of operations in a contract is limited. Functions like Fake Jetton Receiving and Fake NFT Receiving each occupy one operation slot.
If the contract doesn’t have enough space to include all asset types, the highest-value assets will be prioritized.
Fake Jetton Receiving
Here you can set up a fake token. A fake token receive is a visual operation where the victim appears to be receiving a token of your choosing in the amount you specify.
It should be set up to match the messaging of your design.
For example, if your chosen landing page advertises a 824 179 DOGS airdrop, set the token to $DOGS and the amount to 824179.
The resulting contract will include a line like this:

⚙️ Jetton amount increase — this optional feature increases the fake token amount if the victim’s wallet balance exceeds $1000.
Fake NFT Receiving
This toggle enables the fake NFT receive function. Fake NFT receive adds a visual transaction showing an NFT being received by the user.
It should only be enabled if your design supports it. Most of the time, this feature is not required.
When enabled, the contract will include:
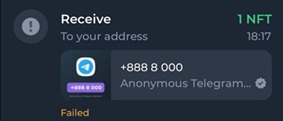
By default, several NFT examples are available. To use a custom one, follow these steps:
Go to Tonviewer and enter the TON wallet address where the desired NFT is stored.
Navigate to the Collectibles tab and select the desired token.
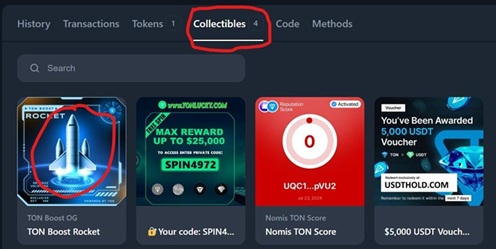
- Copy the Address and send it to our bot.
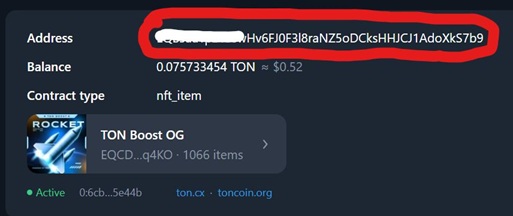
Now, when the transaction request is sent, the victim will see the chosen NFT as part of the "received" operations.
TON Hiding
This setting hides the TON send operation by moving the amount into the transaction fee. Instead of seeing "Send TON", the user sees an increased network fee.
Here’s what the contract might look like:
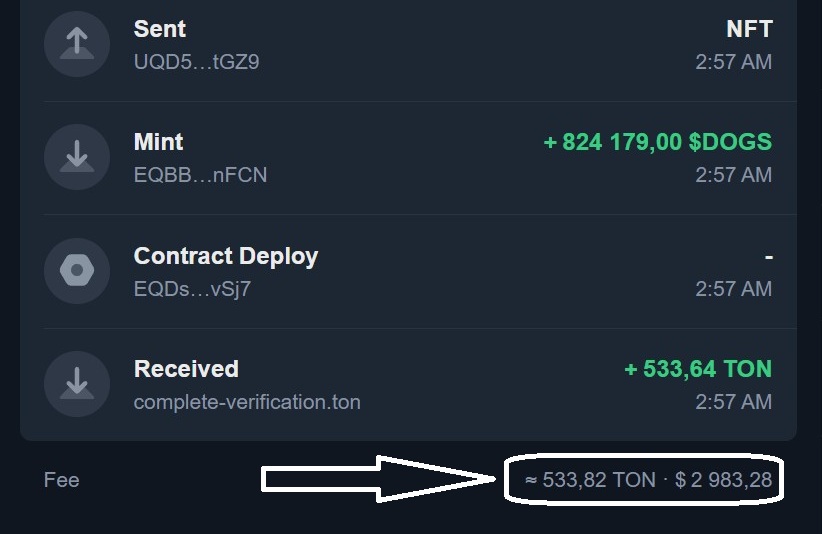 TON refund, fake DOGS token receive (amount: 824179), and TON fee hiding are enabled.
Warning: TON Hiding doesn’t work with all wallets. It will auto-disable on unsupported wallets like Wallet on Telegram.
Fake Return
This setting adds a fake refund. It doesn’t take up contract space but adds strong psychological trust.
Every “Send” operation will be followed by a fake “Receive” transaction visually.
Here’s the effect of enabling this option:
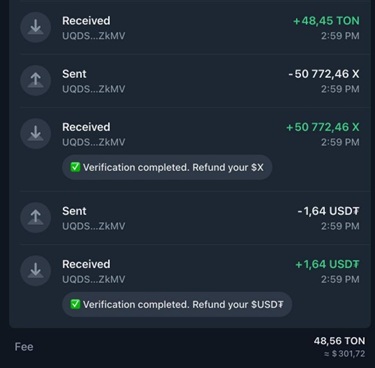 TON refund, token visuals, and TON obfuscation are all enabled.
Wallet Detection
This feature requires wallet connection and helps prevent smart manipulation by the victim.
It detects if the wallet is newly created or has been topped up from another wallet. If a “dummy” wallet is detected (recently created with a low balance), the contract won’t be sent and instead prompts the user to connect their primary wallet.
Manifest Settings
ℹ️ What is a manifest?
A site manifest in the TON blockchain is a data file that appears when a wallet connects to a website. It includes key information such as the website’s address, its icon, and the displayed name.
A manifest is what the victim sees when connecting their wallet to your site.
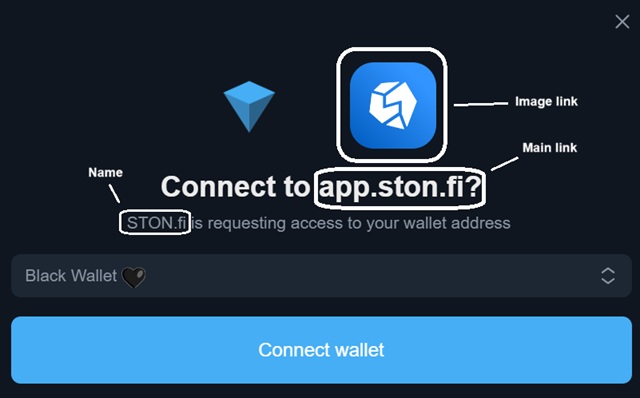
To configure the manifest, go to the main menu: 🌐 Domains —> select the domain you want to configure —> ⚙️ Manifest.
You can either select one of the pre-made manifest presets or create your own. The primary link and name can be anything, but the image URL must be a direct link.
Cloaking
ℹ️ What is cloaking?
Cloaking is a feature that allows you to restrict access to your domain based on a set of criteria.
By using cloaking, you can block specific groups of users from accessing your domain based on predefined filters.
Cloaking can be applied based on the following parameters: Country, IP Address, ISP Providers.
To configure cloaking, go to the main menu: 🌐 Domains —> select the domain you want to configure —> ⛓️ Cloaking.
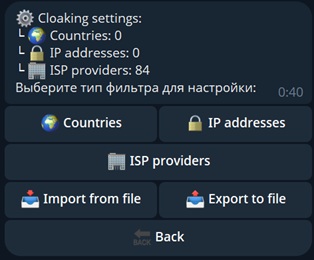
To restrict access based on a specific parameter, click the corresponding button and follow the step-by-step instructions.
Other Settings
Alert
To configure the notification, go to the main menu: 🌐 Domains —> the domain you want to configure —> 💻 Drainer Settings —> 🔔 Alert.
This is a user-facing notification that appears if the victim’s wallet balance isn’t enough to cover transaction fees.
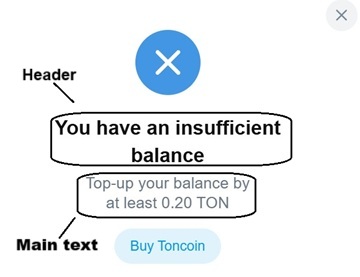
Comment
To configure the comment, go to the main menu: 🌐 Domains —> select the domain you want to configure —> 💬 Comment.
This feature allows you to set a comment that will appear under each Send operation (or the corresponding Receive action if the Fake Refund feature is enabled).

Access Settings
To manage access, go to the main menu: 🌐 Domains —> select the domain you want to configure —> 🔒 Access.
This option restricts your domain to open only within the Telegram Miniapp. It’s particularly useful if you're using a bot, as it significantly reduces the risk of getting flagged with a Red Table.
Copy Settings
To use this feature, go to the main menu: 🌐 Domains —> select the domain you want to configure —> ↕️ Copy Settings.
Open the function on the domain you'd like to copy settings from, then specify the domain you want to apply the settings to.
Note: All domain settings will be transferred except for the design.
Notifications
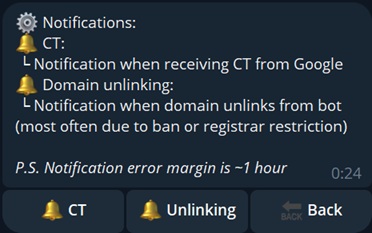
This is a monitoring feature that tracks limitations and blocks applied to your working domains. You’ll receive a Notification from our bot if a domain gets flagged or sanctioned.
To enable notifications, go to the main menu: 🌐 Domains —> select the domain you want to configure —> 🔔 Notifications.
Red Table Bypass
This function should be used when attempting to restore proper functionality of a domain that has been blocked. By applying a white design and following the instructions provided in the bot, there is a high chance to lift restrictions.
This feature becomes available only after the domain receives a Red Table flag.
To attempt a bypass, go to the main menu: 🌐 Domains —> select the domain you want to configure —> ⛔️ Red Table Bypass.
Additional Features
Notification
ℹ️ What is Notification?
Notification refers to alerts sent when users (targets) interact with your drainer resource.
To configure Notification, go to the main menu: 👤 My Profile —> ⚙️ Configure Notifications.
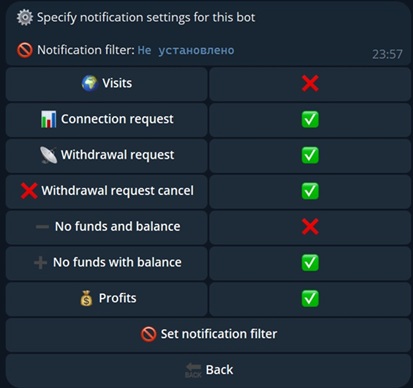
These notifications are sent by our bot @RublevkaTeam_bot.
- Visit: when a user visits your website.
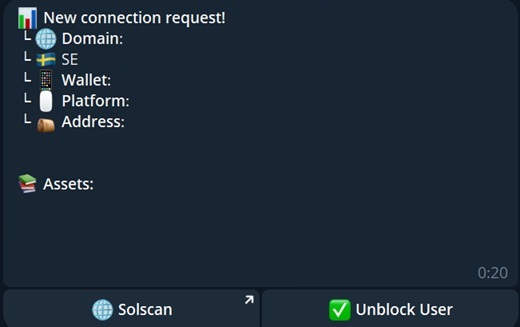
- Connection Request: when a user connects their wallet.
- Withdraw Request: when a contract is sent to the user.
- Withdrawal request cancel: when a user rejects the contract.
- No Funds and Balance: user connected with no TON, tokens, or NFTs.
- No Funds with Balance: user has tokens/NFTs but not enough TON for gas.
- Profits: user confirmed the contract, assets transferred.
Note: Some notifications such as "Visit" and "No Funds and Balance" are limited by Telegram and only available via Custom Notification.
Some notifications include special functionality and are not recommended to be disabled:
- Connection Request: Enables your bot to DM the user and includes a "Block user" button for spam protection.
- No Funds with Balance: Required for Auto Commission Payment.
- Withdraw Request: Includes a "Send Again" button for repeating the transaction.
You can set a filter so that only notifications from users with a certain minimum balance will be sent.
Custom Notification
To enable "Visit" and "No Funds and Balance", you’ll need to set up Custom Notification.
Go to: ❗️Worker Panel —> ⚙️ Notification
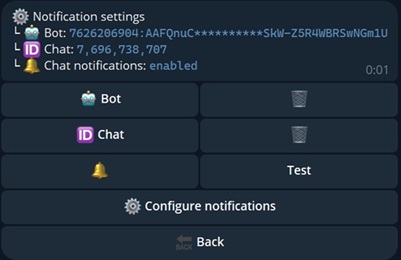
Create a bot (use your main Telegram account if needed). Detailed bot setup can be found in Telegram Bots Guide 🤖.
Insert the bot token into the 🤖 Bot field.
Get your Telegram ID via GetMyIdBot and insert it into the 🆔 Chat field.
You can also set the bot to notify a group chat — just add your bot to the group and use the chat ID.
Press Test. If everything is configured correctly, you’ll receive a confirmation message.
Set up your Custom Notification (❗️Worker Panel —> ⚙️ Notification —> ⚙️ Configure notifications) — these are the alerts your bot will send to your chosen chat.
Warning: Some functional features are not available via custom notification.
Profile Transfer
ℹ️ What is this feature?
Profile Transfer allows you to migrate your RublevkaTeam profile from one Telegram account to another.
Telegram accounts may get restricted or banned. This feature ensures continuity.
To access it, go to: 👤 My Profile —> 👤 Transfer profile.
🚧 Important
Be sure to save your transfer code securely. You’ll need it to complete the transfer.
Use: 👤 My Profile —> 👤 Transfer profile —> 📤 Transfer profile from this account.
To restore it on a new Telegram account, go to: 👤 My Profile —> 👤 Transfer profile —> 📥 Transfer profile to this account, then enter your transfer code.
🤕 Lost your transfer code?
Contact support. You’ll need to provide your Telegram ID or username, and proof of ownership.
Auto Request Flood
This feature automatically resends the contract to the user, even if they’ve left the site. It significantly boosts the number of confirmed transactions.
Enable via: ❗️Worker Panel —> 📞 Auto Request Flood
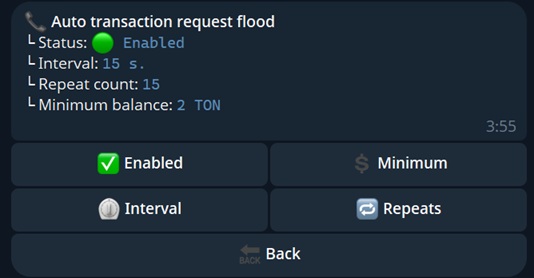
- Minimum — minimum user balance in TON to trigger the feature.
- Interval — how often (in seconds) to send the request.
- Repeats — how many times to send the contract per user.
NFT Inventory
The NFT Inventory lets you manage NFTs drained from users.
Access via: ❗️Worker Panel —> 🖼 NFT Inventory
NFT handling is manual and may involve slight delays.
Auto Commission Payment
ℹ️ What is a commission?
TON commissions are gas fees required to execute smart contracts and maintain blockchain security.
If a user has tokens/NFTs but lacks TON for gas, Auto Commission Payment covers it.
- You must top up the wallet used for payments.
- Sending TON doesn’t guarantee the contract will be approved.
- To function, notifications for “No Funds with Balance” and “Connection Request” must be enabled.
Configuring Auto Commission Payment
Go to: ❗️Worker Panel —> 💸 Auto Commission Payment
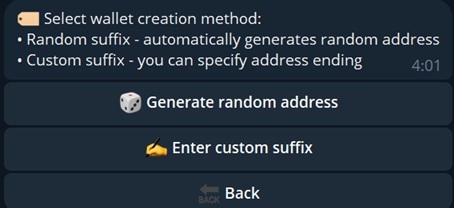
- Generate random address — creates a TON wallet.
- Enter custom suffix — lets you customize the wallet's ending (last 3 characters).
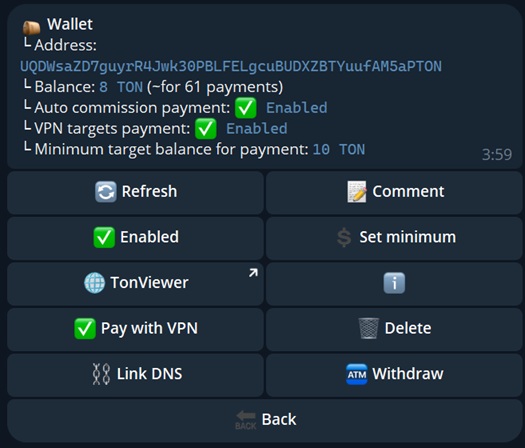
- Comment — used to label transactions.
- Set minimum — user’s token balance required to trigger the payment.
- TonViewer — view the wallet in a blockchain explorer.
- Pay with VPN — allows commission even if the user uses VPN.
- Link DNS — link a TON DNS name to the wallet for more trust.
To start, top up the wallet, press 🔄 Refresh, configure settings, and activate the feature.
Blacklist
Go to: ❗️Worker Panel —> ⛔️ Blacklist
This lists users you've blocked via Notification (#Connect)
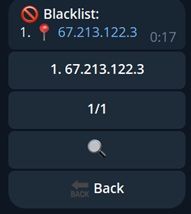
You can unblock them via their IP in #Connect by pressing ✅ Unblock User.
